Peripheral Tutorial
Introductions
"Peripherals," or devices attached to a computer, are implemented in NEET computers to enhance computer integration with the world around them and to provide tools for the player to exploit. Peripherals, as a system, consist of peripheral devices, containing accessible functionality, computers, which can interact with and utilize peripherals, and cables which determine what computers access what peripherals. This tutorial will instruct you how to connect and configure peripherals and cables, and introduce basic concepts, except for instructions on how to program them, for that refer to The IO API.
Basics
The first step to understanding peripheral management is to understand the most in portent tool thereof, the peripheral cable item!
When holding the cable tool, you will notice some blocks will now be marked with a purple plus icon (effect pictured below)
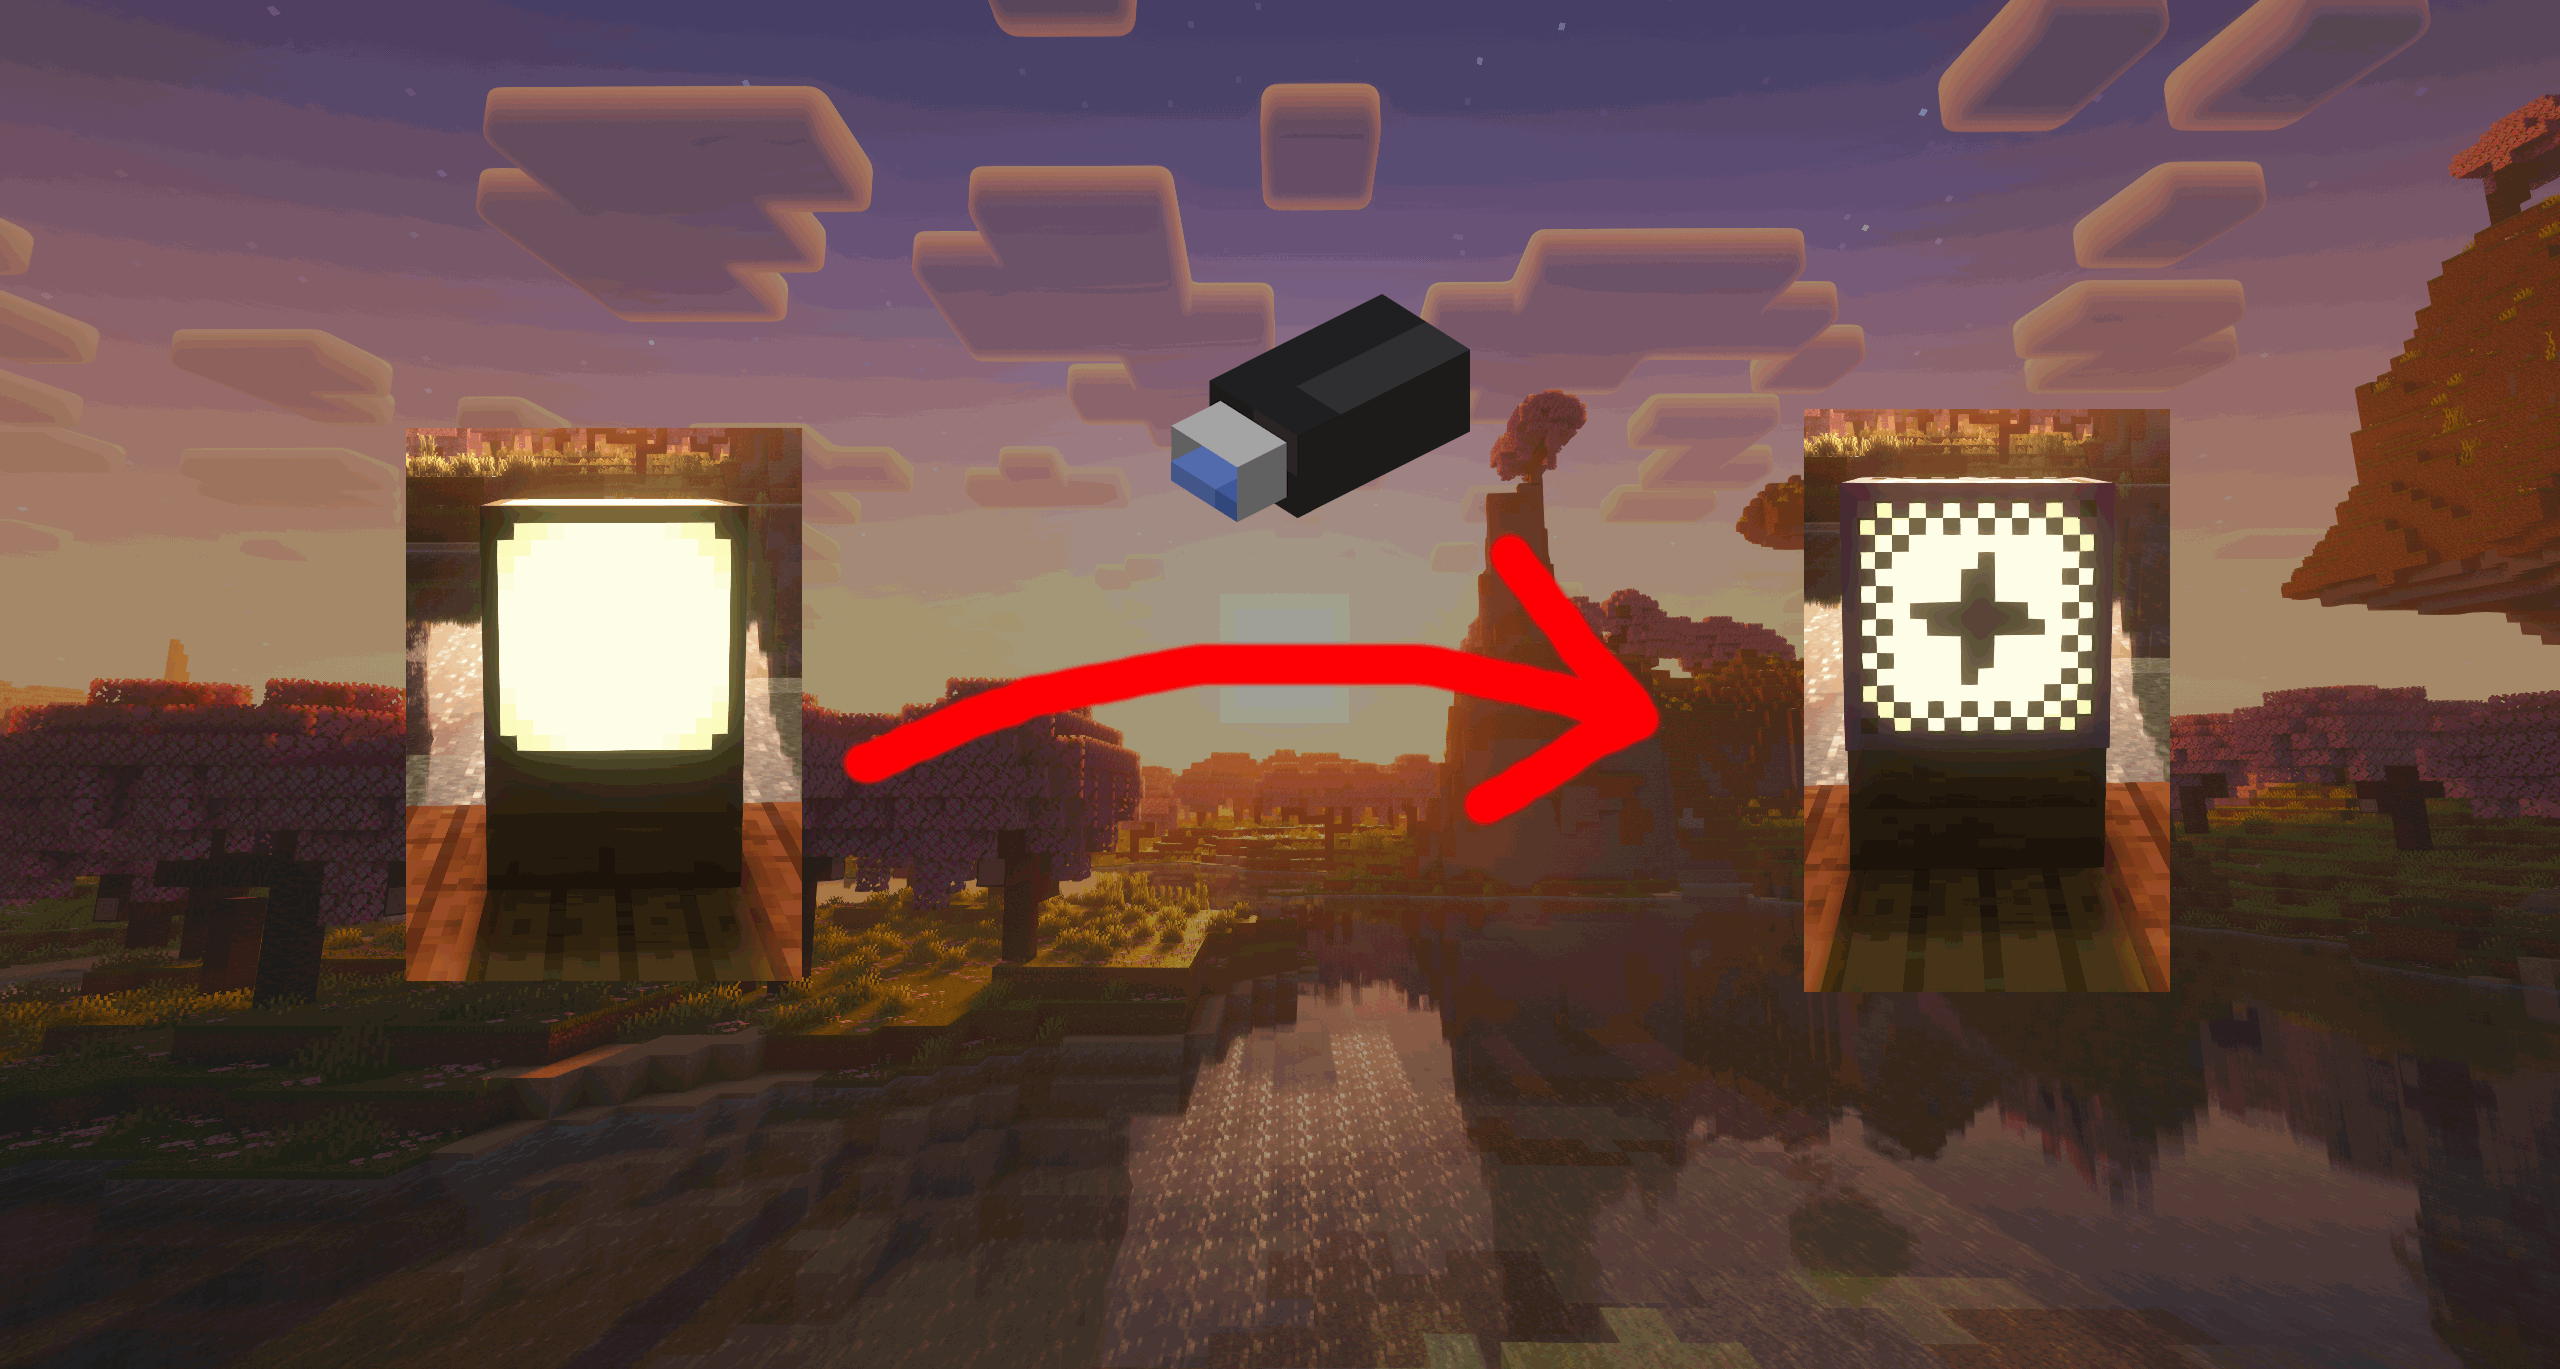
This new visual overlay is how you will see peripheral infrastructure, which by default is invisible. Of course the purpose of the peripheral cable tool is not to view infrastructure but to create it, clicking on any block with the tool will place a new overlay into it, this overlay represents a cable. please forgive the difference in brightness on this next diagram, the two icons are rendered differently and the shader finds the situation unideal.
Connecting devices
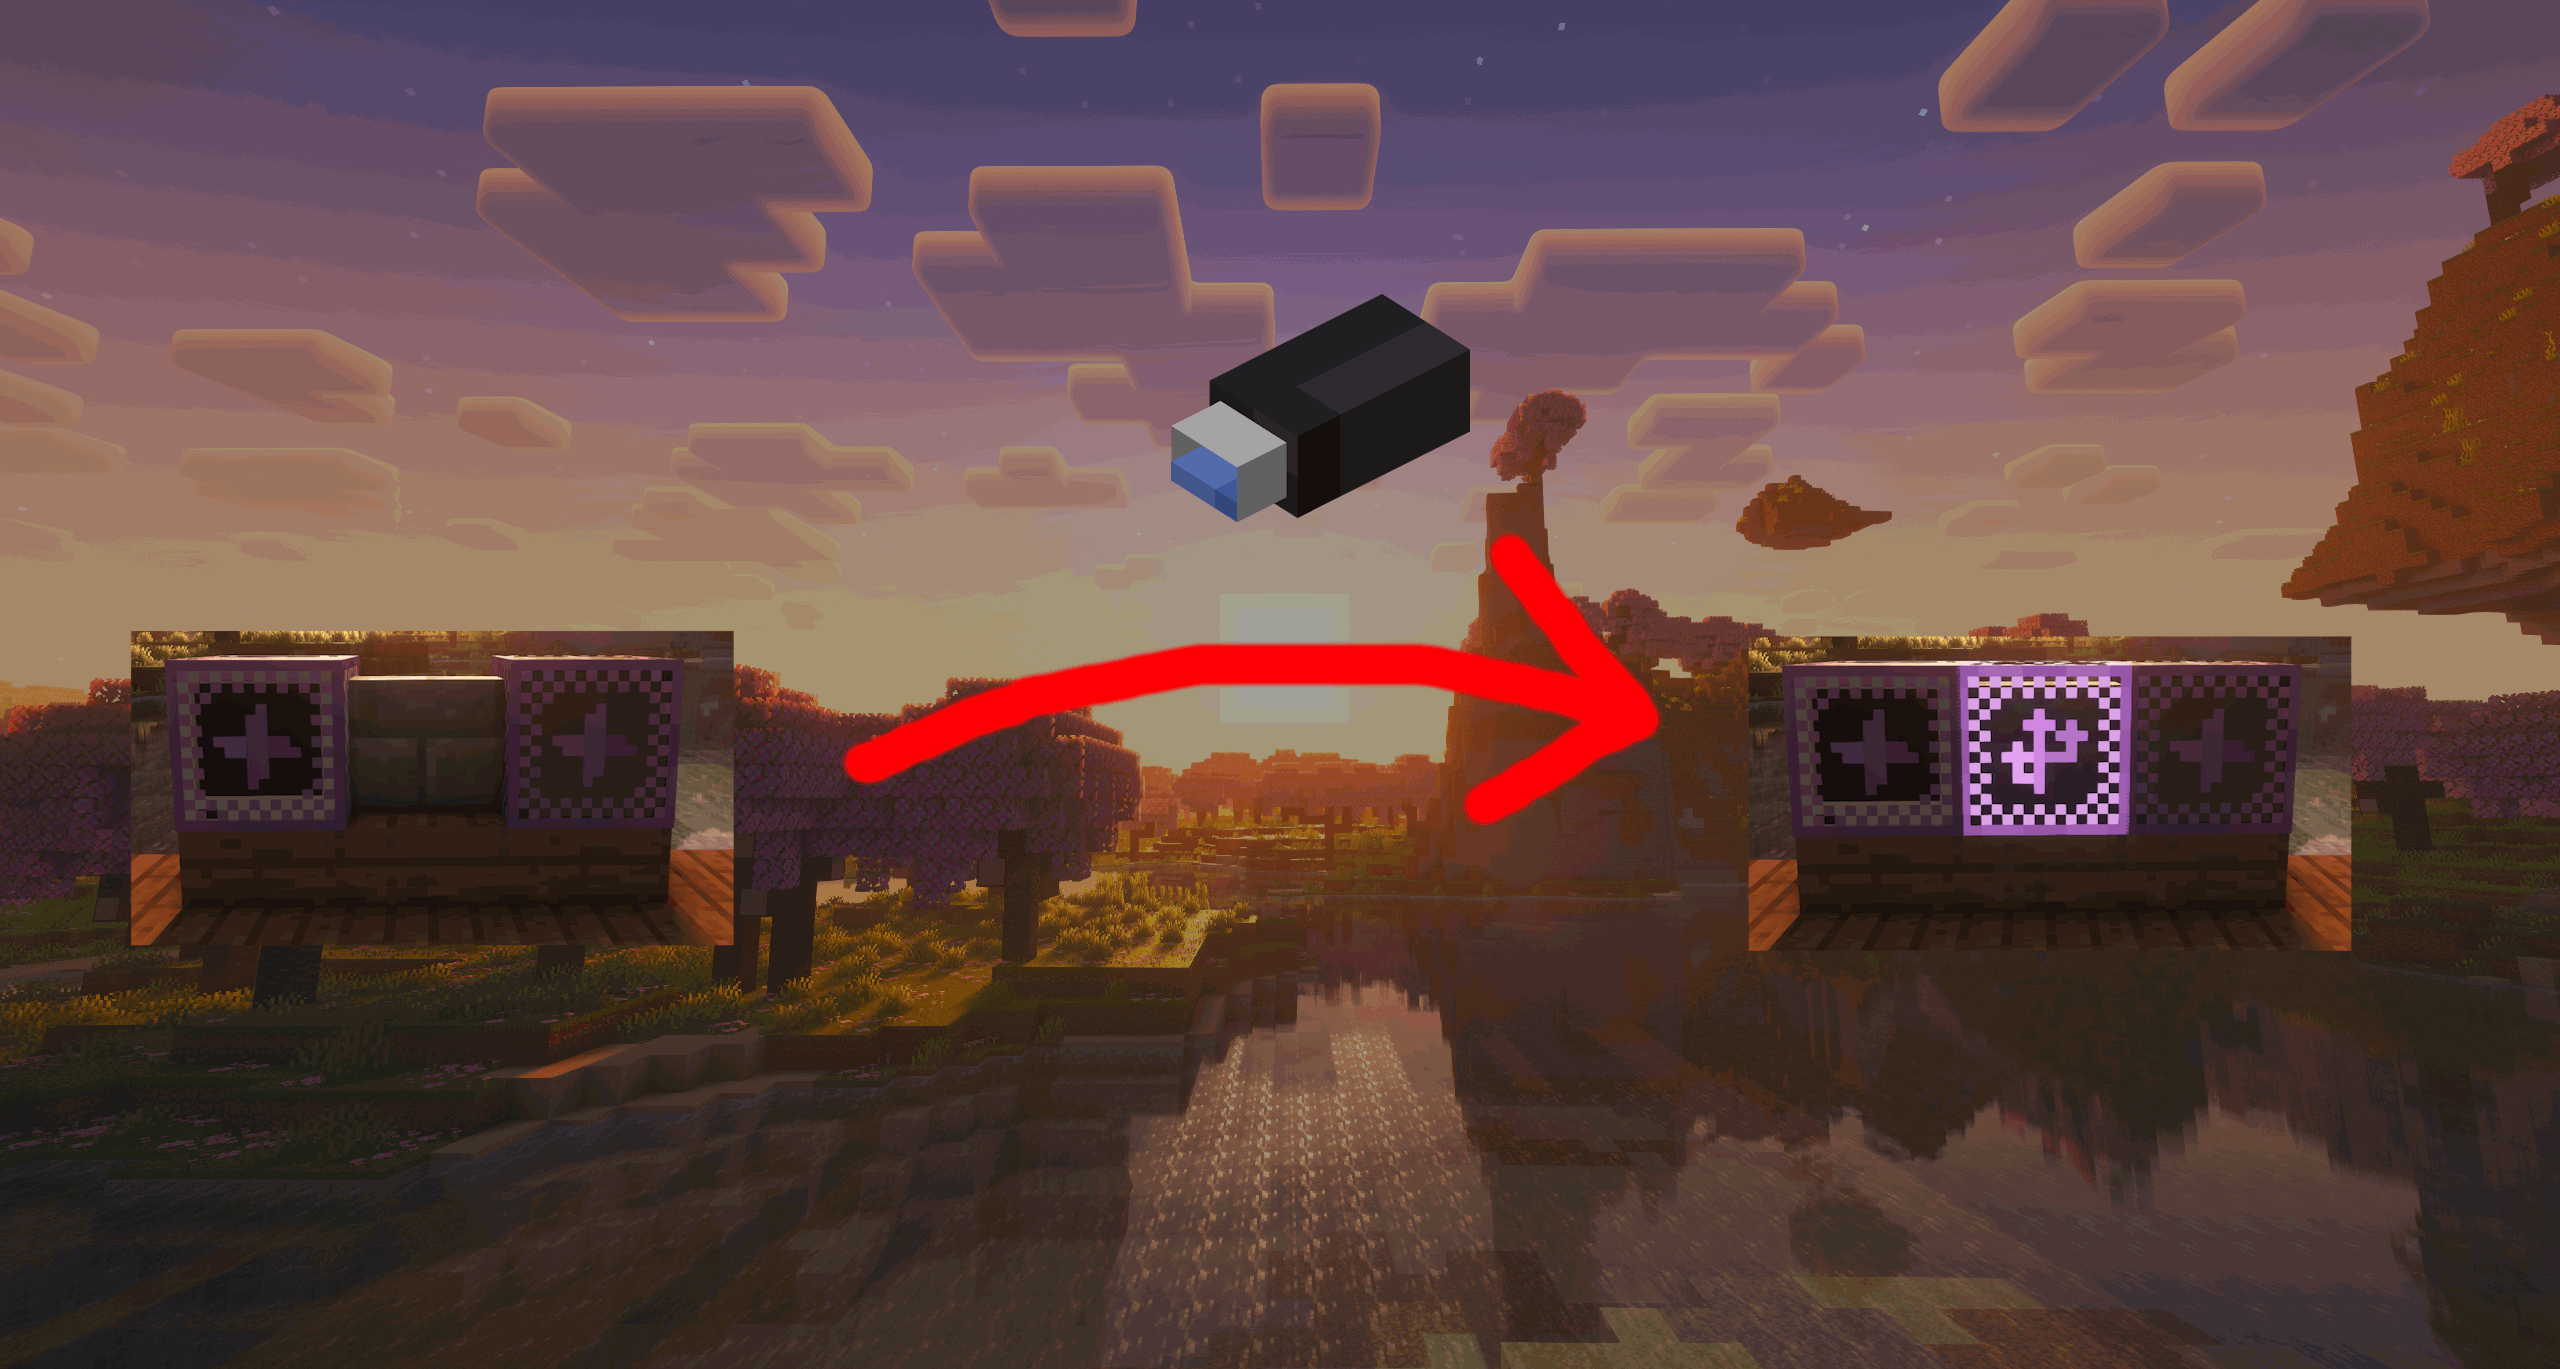
Now that you can see and place cables, we can connect computers and peripherals together. Intuitively you can simply place cables between devices to connected them as shown.
Note how the computer leftmost can access the light in the center, but not the one on the right, this is because the connection can not travel through devices, only cables, so the right lamp is technically unreachable.
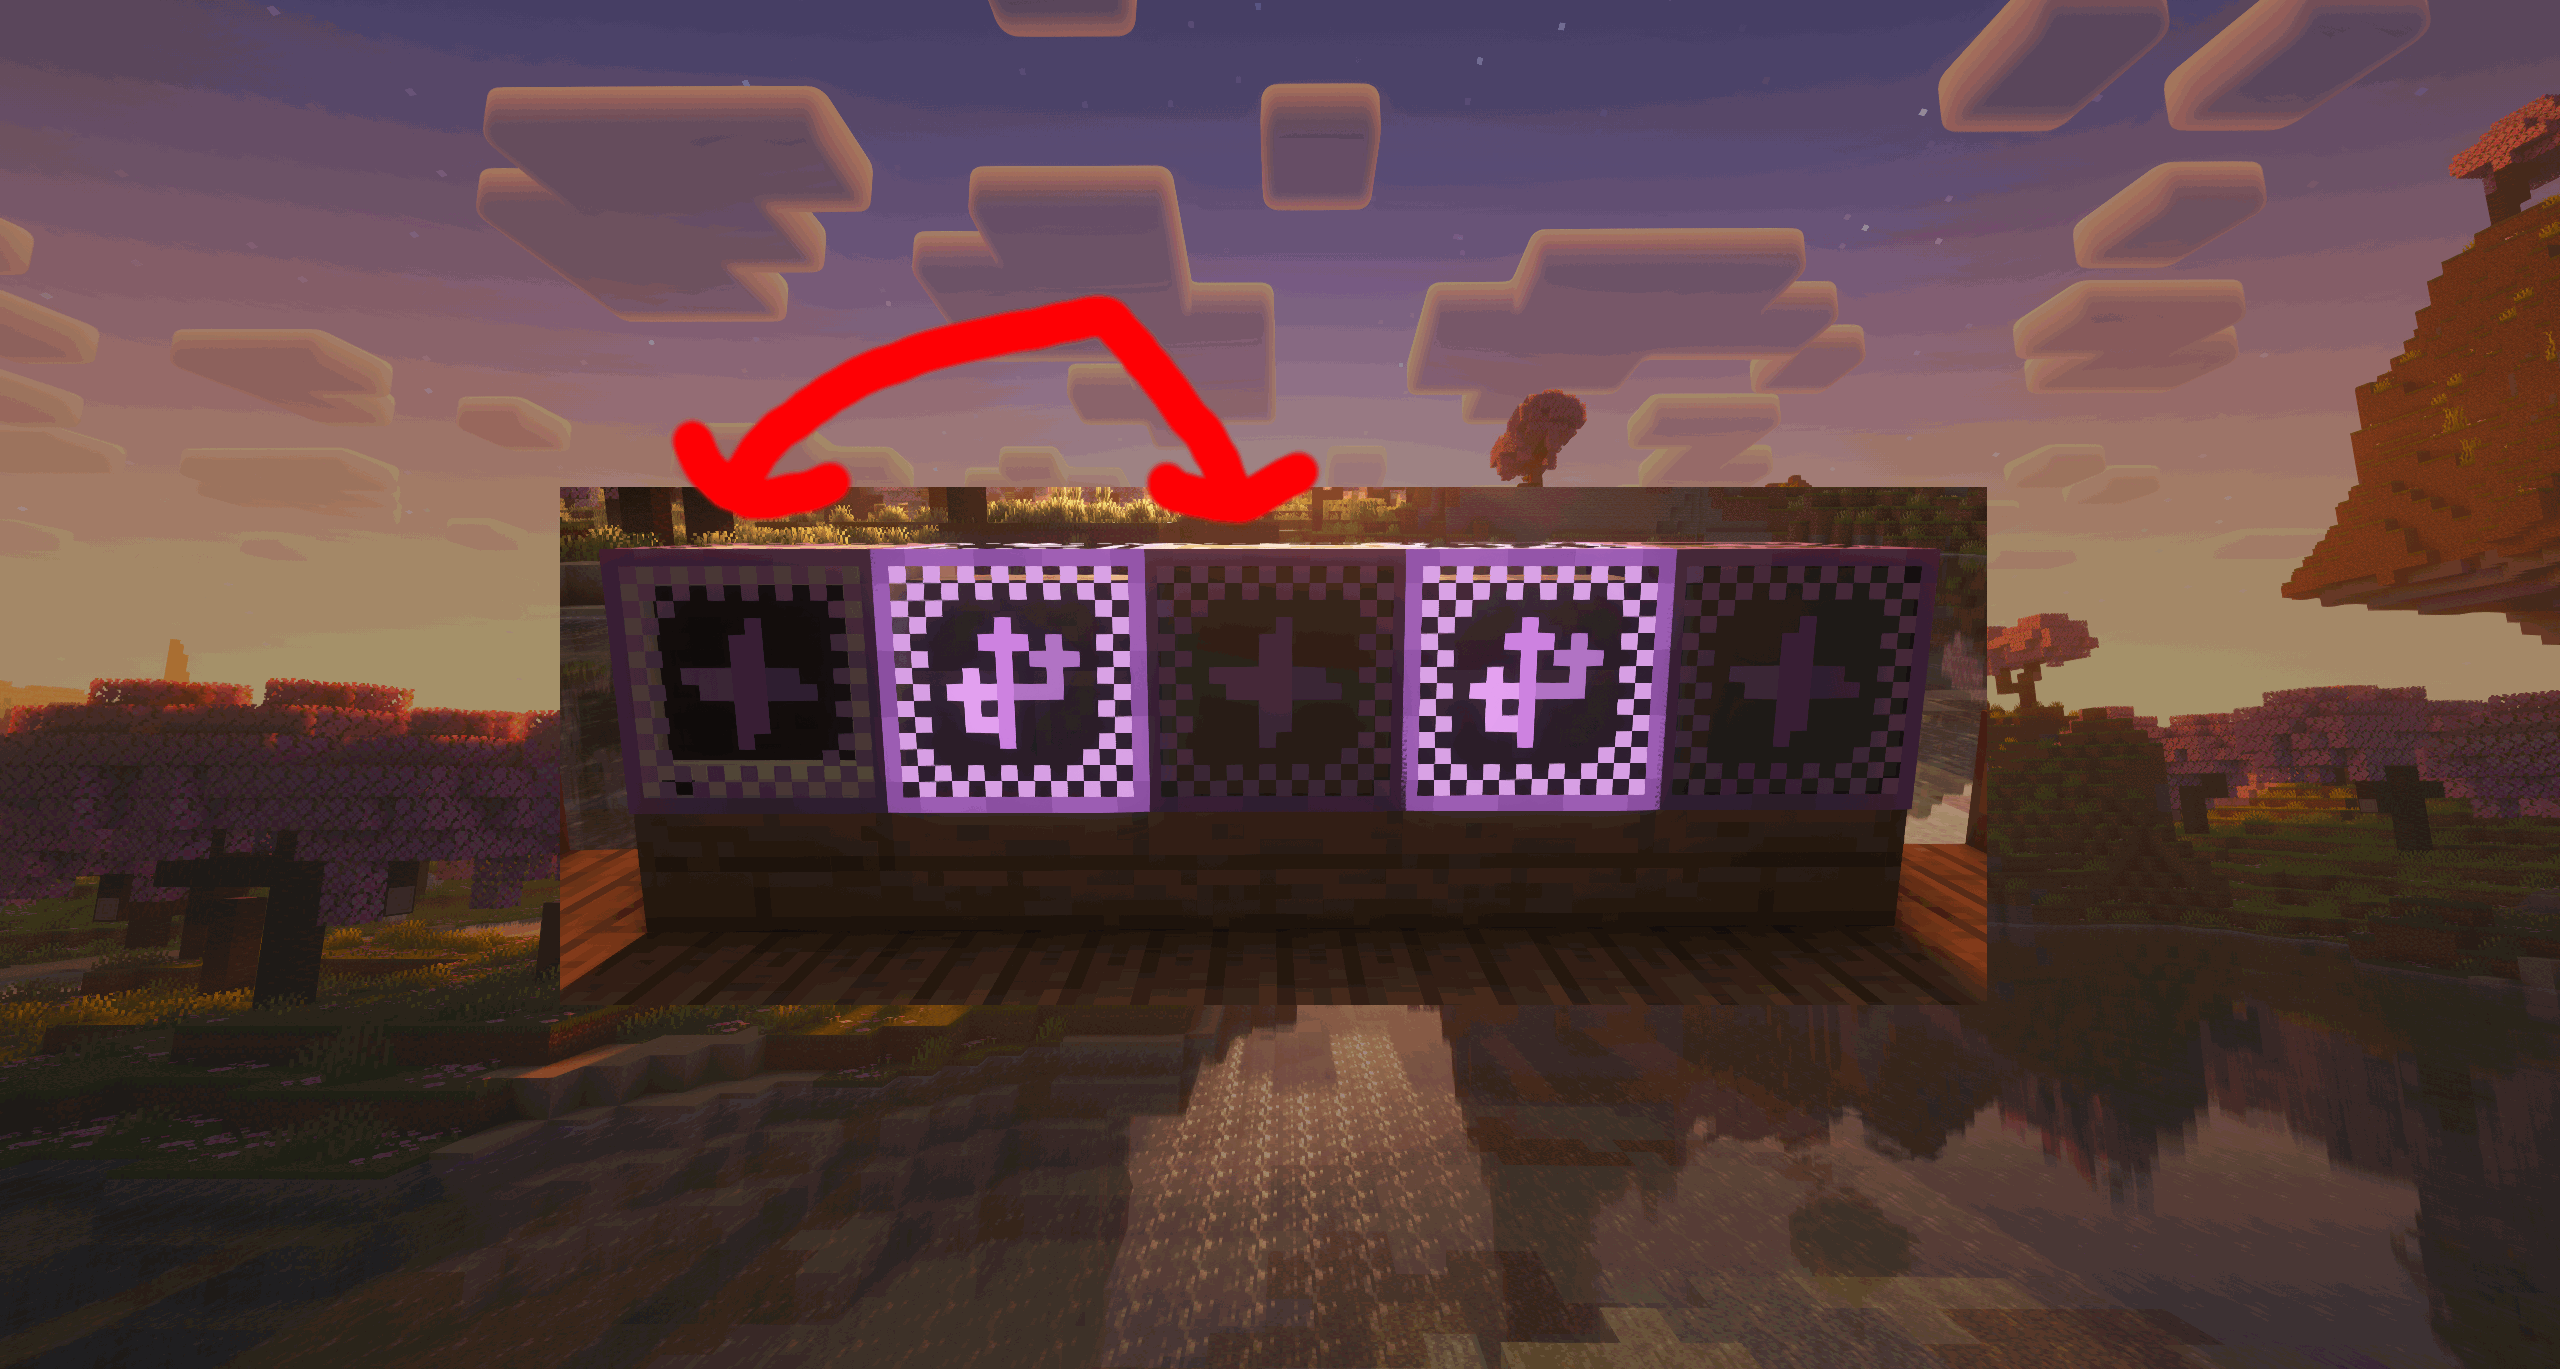
This is to allow connections to intersect without necessarily connecting, but in you want to make that connection you can do so by placing the cable over the device itself, which will preserve the original connection while allowing that connection to go past the device to cables past it. (in some cases you might need to shift click to place the cable)
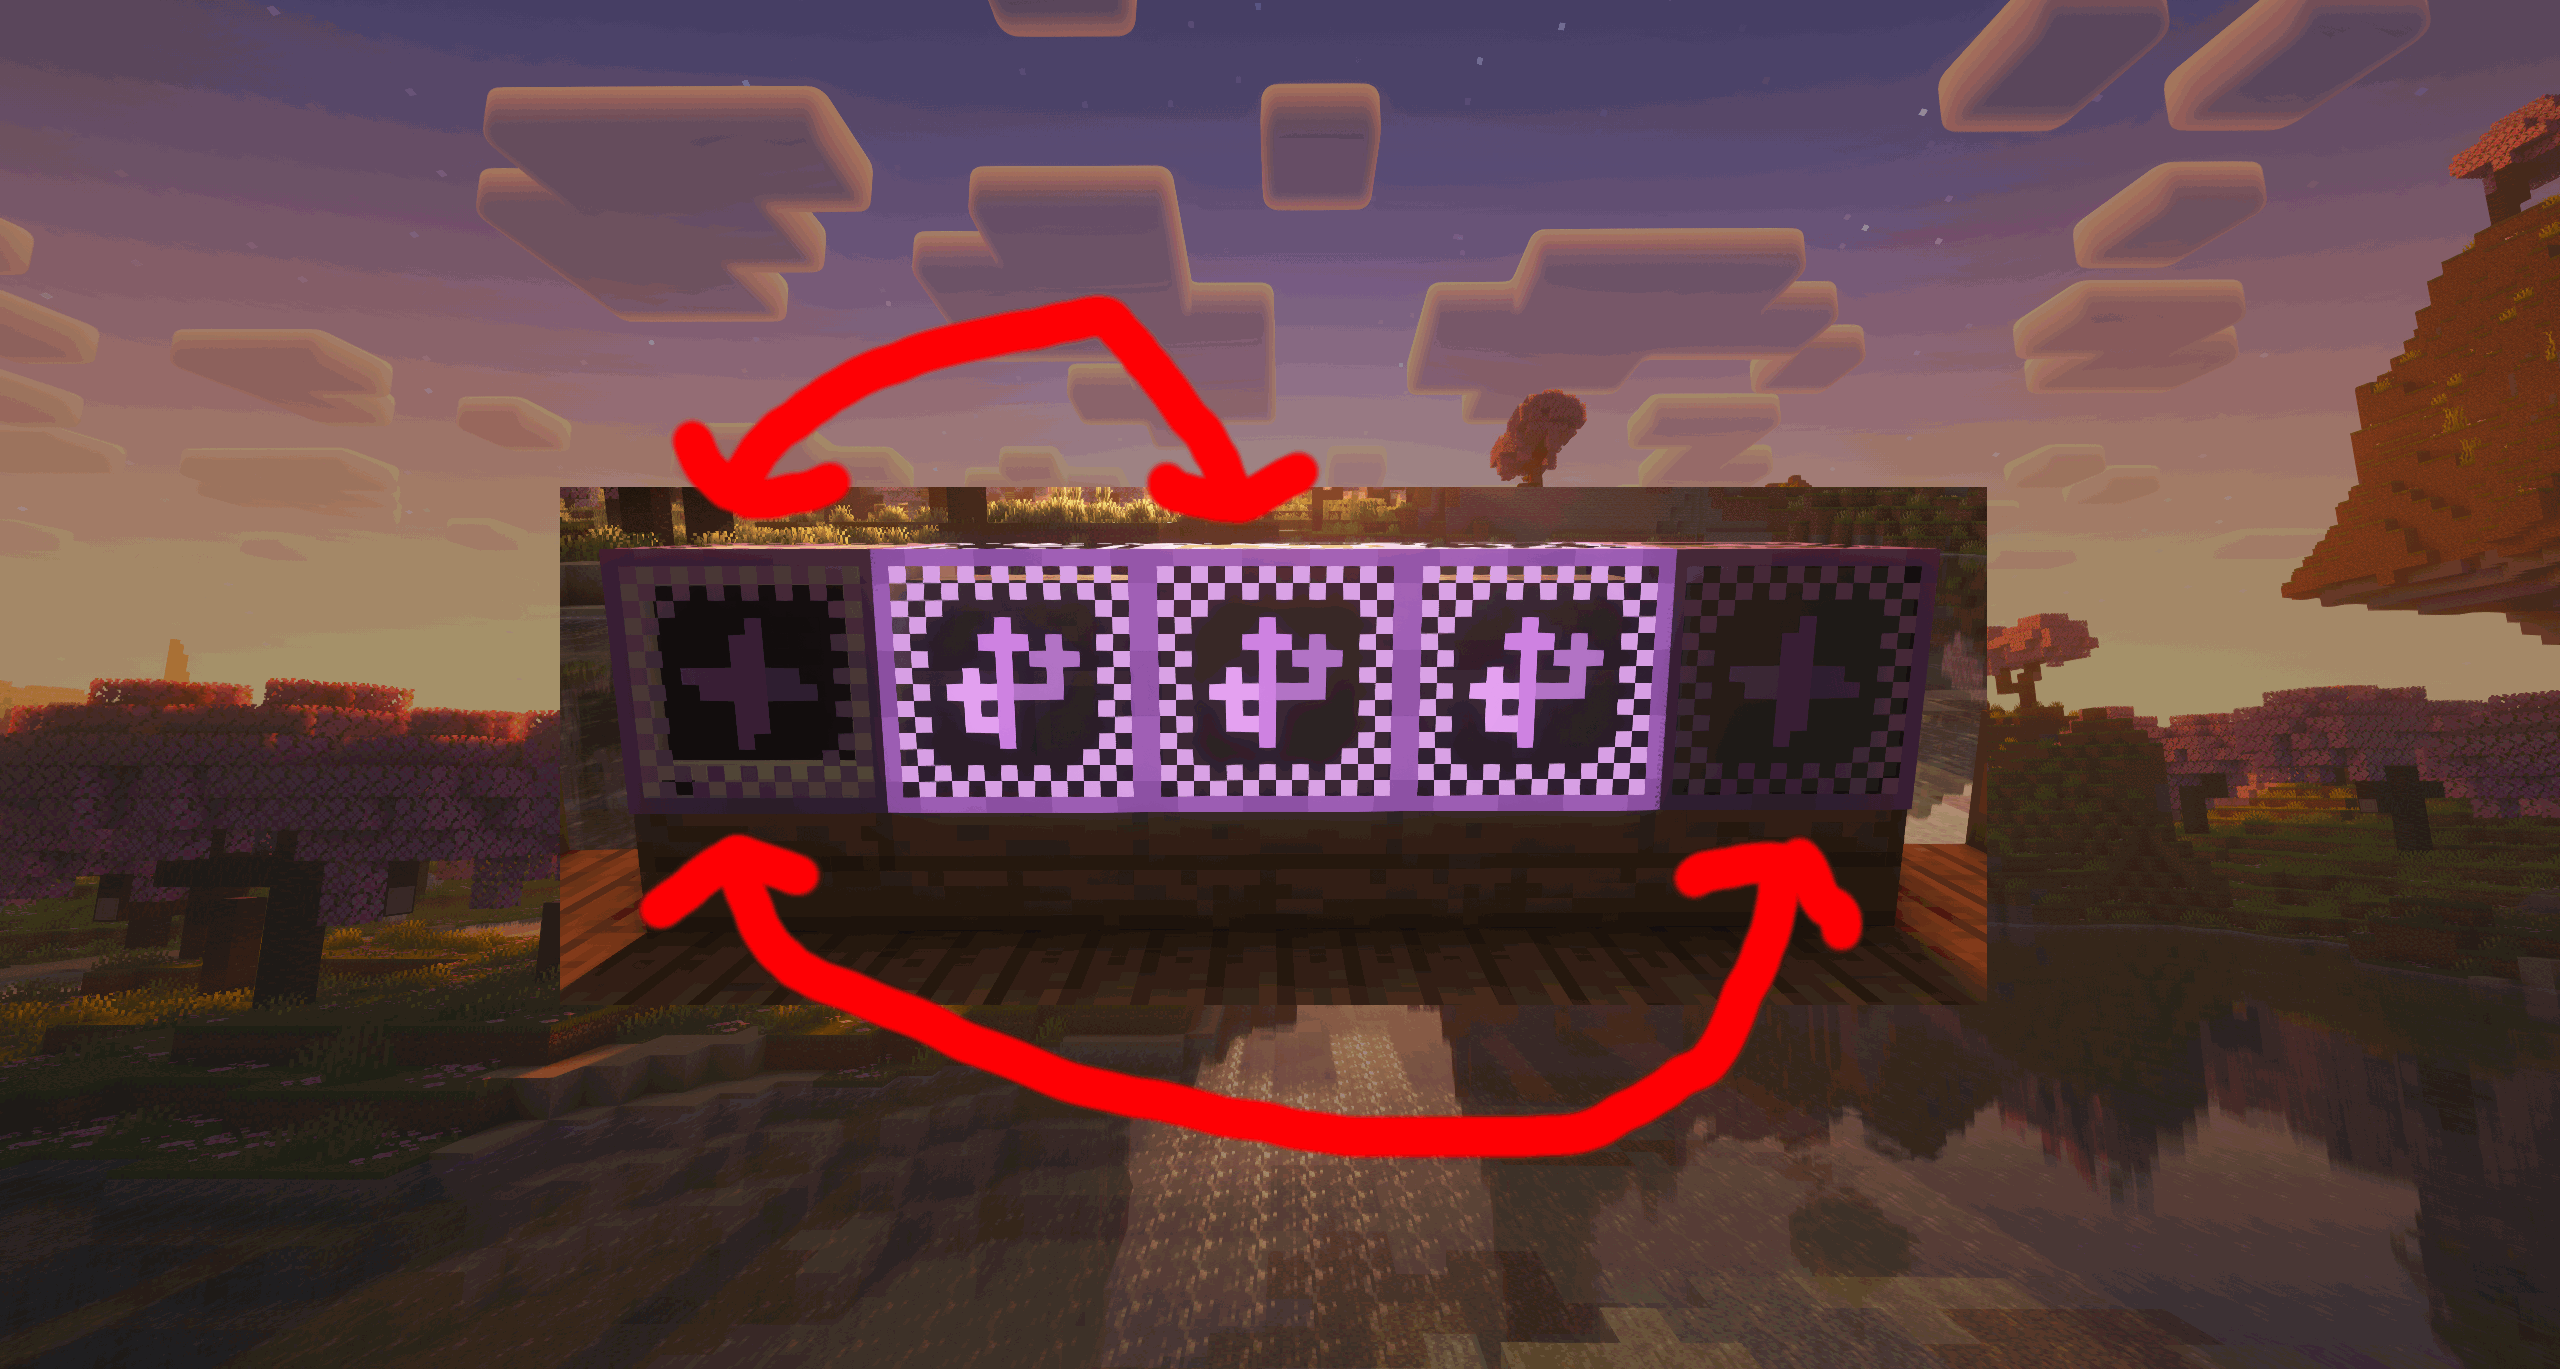
Notice how with the extra cable between them now the computer can reach all the lights
Advanced Configuration
You now know how to wire peripherals, but you lack the advanced knowledge that can be useful in many situations
It's time to introduce the Peripheral Config Tool, this tool like the cable tool will allow you to see peripheral infrastructure, but it provides functionality the cable tool does not, as shown when you click on a peripheral with it!

To break down the menu of the tool, I should explain some property of peripherals, all peripherals have a type, a piece of text identifying what type of device the peripheral is and what mod added it. peripherals also posses a UUID, a long string of numbers and letters that identify the specific peripheral and set it apart from any other device then itself, computers also pusses such a UUID themselves, and finally peripherals have a "tag".
Hovering over the type or uuid fields on the menu will display the relevant property, however the tag is set with the topmost text input, tags are text that peripherals can be given to more intuitively identify them then using their UUID. Tags, UUIDs, and types are all programmatically accessible to computers, and it's wise to utilize them when making programs for the mod!
The final element of the menu in the "Manual Function input" and the submit button next to it, When setting up peripherals you may want to adjust it without purposing an entire computer and script in order to do so, the manual function input can execute a function the peripheral has, as "setLuminance(7)" or "setLuminance 7", although the manual input can only process String, Number, and Boolean parameters.
And with that final feature explained, you now know everything to know about peripherals (if you read the API documentation aswell), now set forth and make something!